This is hassle for Android users, especially if you’re starting media playback on a remote Bluetooth device, for example. Fortunately, there are numerous ways to permanently disable the volume limit warning, and this Appual’s guide is going to show you rooted and non-root methods for this.
How to Disable Volume Warning on No Root Android
Requirements:
Tasker appAutoTools appADB Tools on your PC (see Appual’s guide “How to Install ADB on Windows”)
The first thing you’ll need to do is download all of the requirements, then enable USB debugging on your Android device. Go into Settings > About > tap Build Number 7 times until Developer Mode is activated. Then go into Settings > Developer Options > enable USB Debugging. We need to grant WRITE_SECURE_SETTINGS to the AutoTools app, because what we’re basically doing is tweaking a flag in the Android manifest Settings.Global class – apps pretty much never have permission to alter anything in the Android manifest, because it would give the app a huge amount of control over your device, but luckily with ADB we can grant that permission.
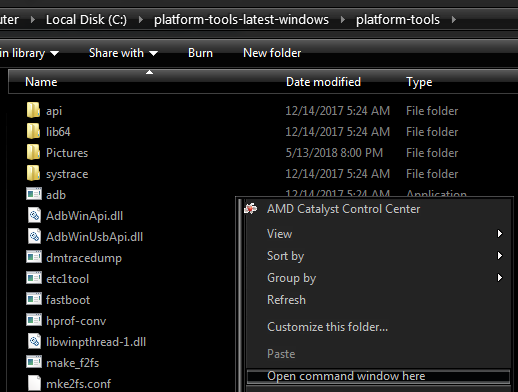
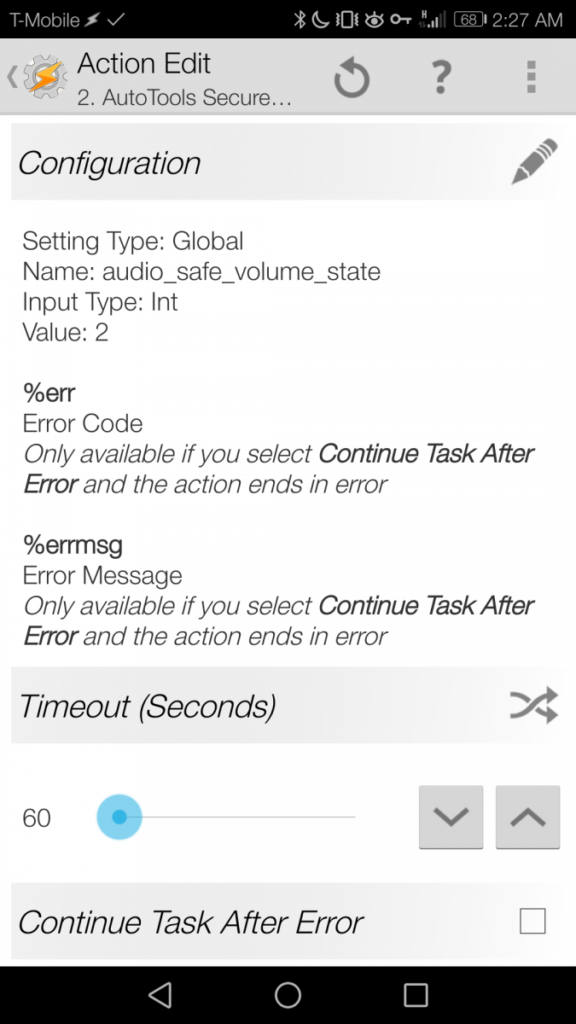
So launch an ADB terminal on your computer (hold Shift + right click inside your main ADB pathway and choose “Open a command window here”). In the ADB terminal, type the following command: Now that AutoTools is able to write to the Manifest, we’re going to configure Tasker to instruct AutoTools to disable safe audio on boot. Launch the Tasker app and create a new profile by tapping the + icon in the bottom right hand corner. Add a new Event context and go to Tasker > Monitor Start. We’re going to use the Event context to trigger when Tasker starts up, rather than when the phone boots, because it’s a more reliable method – but Tasker starts when the phone boots anyway, so its nearly the same thing. Press the back button and create a new Task associated with this profile. In the Task creation screen, press the + icon in the bottom middle of the screen to create a new Action. For the action, set it to Task > Wait and have it wait for 30 seconds. This gets around the “30 second after boot” rule Android uses to set the safe volume state. Next you’ll need to create a new Action and go to Plugin > AutoTools > Secure Settings. Press the pencil button to open the configuration menu for AutoTools. Go to Custom Settings and configure it exactly like this:
Setting Type: GlobalName: audio_safe_volume_stateInput Type: intValue: 2
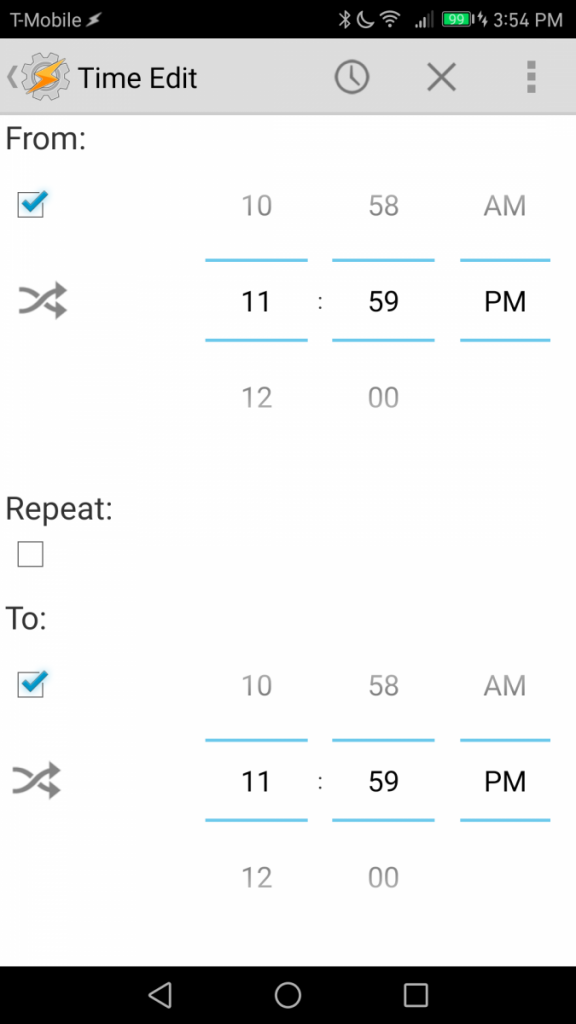
Make sure you’ve put everything in correctly, or else it won’t work. Now go back to the main menu of Tasker, and we will create a new profile. This will be for people who almost never reboot their Android device – the reason we need to do this is because Android will automatically reset the safe volume limit after 20 hours. When you reboot your phone, we’re of course resetting that limit, but if you almost never reboot your Android device, then we need a separate Tasker profile to periodically reset the timer on the safe volume limit. In Tasker, create a new profile with a Time context. Set the Time Edit to the exact same time for both “From” and “To” – this is because we want the Task to trigger only once at a specific time. 11:59PM is good, as seen in the screenshot below.
For the task Action, just do exactly what you did for the previous profile. Reboot your phone, and safe volume warning should be disabled! How to Disable Volume Warning on Rooted Android For rooted Android devices, this is much easier – there’s literally a ton of downloadable tweaks and modules to accomplish what we want. The best method would be through Xposed. If you don’t have Xposed installed on your Android device, the following Appual’s guides would be helpful to read:
How to Install Xposed Framework on Android PhonesHow to Completely Theme Android with Xposed ModulesTop 5 Best Xposed Modules for your Android Device
In any case, once you have Xposed installed on your Android device, there’s numerous Xposed modules which will disable the safe volume warning. The best are: NoSafeVolumeWarning GravityBox (no safe volume warning option is found under Media Tweaks) – For GravityBox, choose the module that is specific to your Android version! For example, GravityBox [N] for Androud Nougat devices, GravityBox [MM] for Marshmallow devices, etc. After installing the module of your choice, just enable it and reboot your phone to activate it, then configure the module if necessary (such as GravityBox – NSVW should work immediately).
How to Disable ‘High Volume Can Cause Hearing Loss’ WarningHow to Disable “Open File - Security Warning” in Windows 7How to Disable Unlock iPhone to Use Accessories WarningFix: Make Sure the File is an NTFS Volume and isn’t in a Compressed Folder or…


