Method 1: Use the Files App
Unzipping
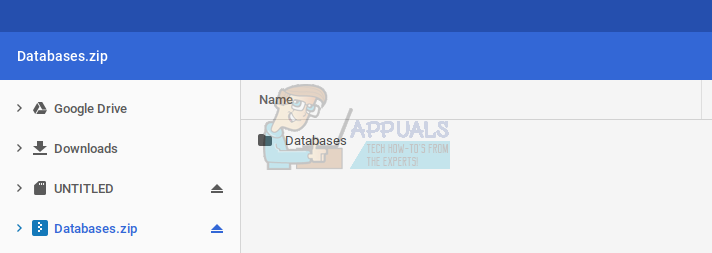
The Chrome OS Files app, while fairly minimalistic, does decompress zipped files. If you double click on a zipped file, you will notice that the file shows up on the left sidebar of the Files app. This sidebar is usually the place where connected USB drives or SD cards would show up. So why is your ZIP file showing up there? Well, because Chrome OS handles ZIP files like external storage. They mount these files in such a manner that the zipped content then becomes accessible through the mounted ZIP file.
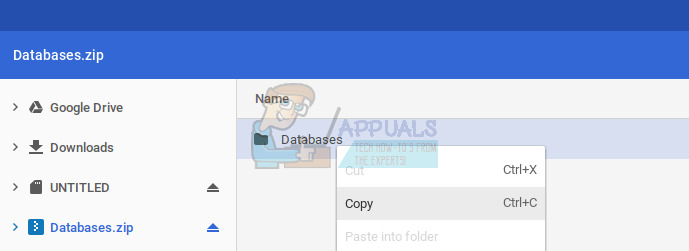
In order to extract your required files from this mounted zip, all you need to do is copy the contents of this mounted drive and paste them outside, in the downloads folder.
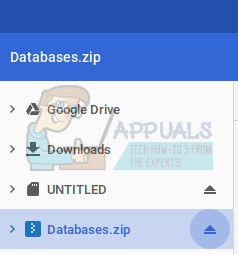
These files will then be available to access outside of the zip, and you can ‘eject’ the ZIP file by pressing the arrow button on the right side of the file in the sidebar.
Note: Trying to open a ZIP file from Google Drive will show an error message. This method only works if the ZIP file is in the Downloads folder on your Chromebook.
Zipping
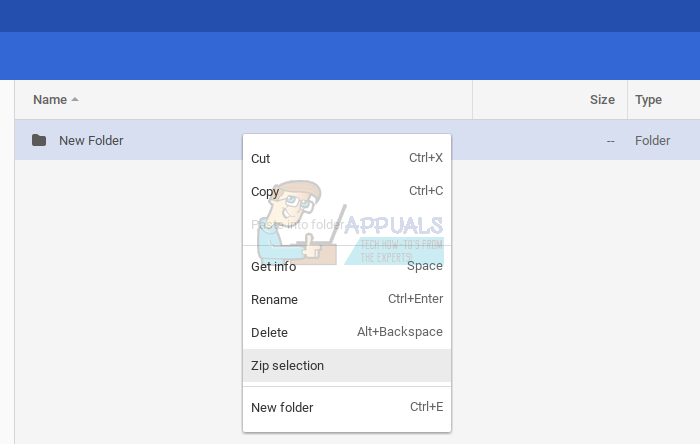
We can sometimes need to send a folder of documents, or some images bundled together in a single file. Zipping is the most common method of sharing folders with other people. It also functions as a file compressor on most operating systems. On the Chromebook, however, the zipping function only zips files together without compressing them at all. The zipped file, then, will be as large as the sum of all the files it contains. It is important to note that all files that you want to ZIP together must be stored on the Downloads folder on Chrome OS. Trying to ZIP files directly from Google Drive does not work on the Files app. (See Method 2 for zipping/unzipping files stored on Google Drive.) Now that you have all the files you want to ZIP in the Downloads folder, create a new folder (by pressing Ctrl + E while in the Files app) and put these files inside that folder. So, all the content that you want to ZIP must be inside that one folder only. After you have created such a folder, right-click on the folder. This dropdown menu will appear.
Click on ‘Zip Selection’ and the ZIP with all your selected files will be created in the Downloads folder itself. It will look like this –
This ZIP file is now ready to be shared with people. This is how you can ZIP files using the Files app on Chrome OS.
Method 2: Use Zip Extractor
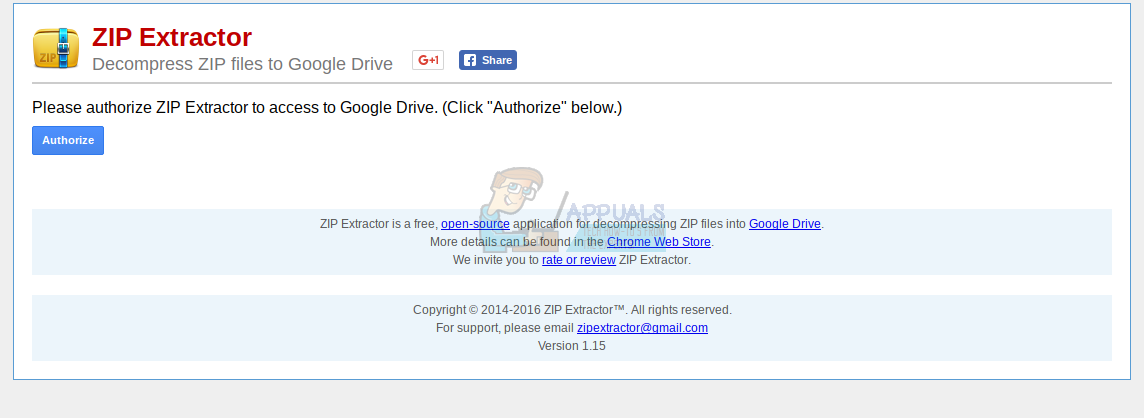
Zip Extractor is an online tool that can unzip files stored in Google Drive or from your Downloads folder. You will have to authorize the tool to access your Google Drive by clicking the blue ‘Authorize’ button. For some reason, you have to authorize access to Google Drive even if you want to unzip a file from your local Downloads folder.
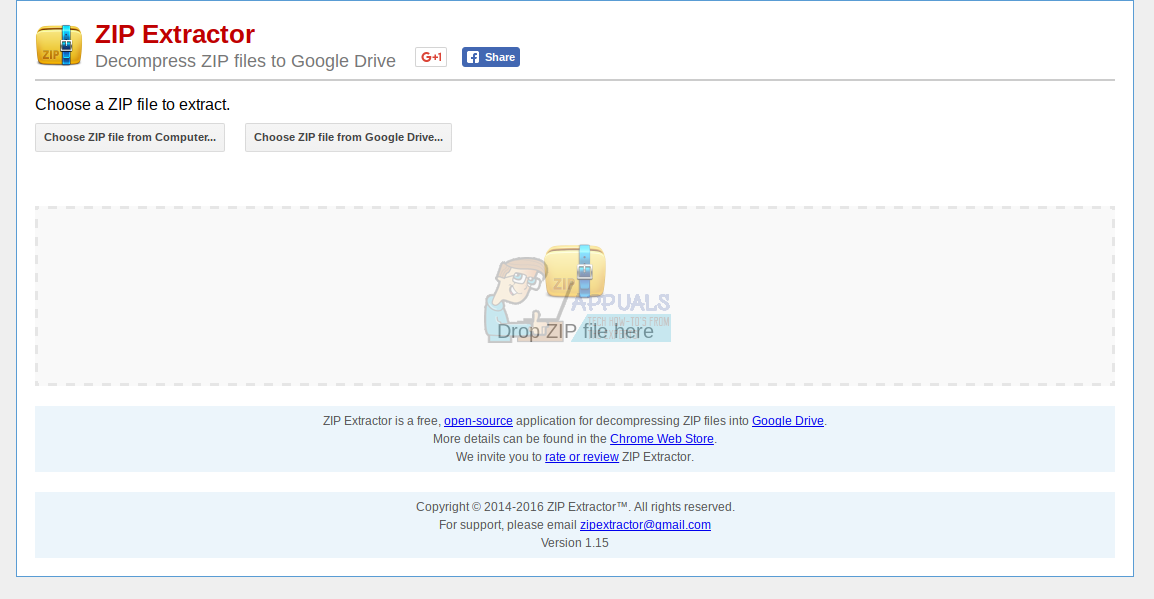
You will then be able to select the ZIP file that you want to unzip from Google Drive or from your local storage.
Once you select a ZIP file to unzip, ZIP Extractor quickly unzips the file and makes the contents of the file available for download. You can also directly save the unzipped content to your Google Drive. This makes it pretty convenient to work with ZIP files inside Google Drive. I would only recommend Method 2 if there’s a large ZIP file on Google Drive that you need to unzip. For local files, it would be much more secure to use Method 1, Chrome OS’s default way of handling ZIPs.
How to Zip ‘Compress’ and Unzip ‘Uncompress’ Files on macOSHow to Zip & Unzip Files on Windows 10How to Restore the ‘Save Link As’ Option for FTP Files in Chrome and FirefoxCheck the Google Chrome Version and the Last Time Chrome Updated
